How to Speed Up Your WordPress Website in Less Than 60 Minutes
- Author: Nick Blazer
- Published:
Last Updated: March 18, 2021
Got a slow WordPress website?
The bad news is it can really be a drag on your performance. Slow page load times lead to high bounce rates and lost sales.
The good news is it is really easy to fix and just about anyone can do it.
My step-by-step guide below will show you how you can speed your website up practically for free. The best part is you’ll be done within the hour.
Table of Contents
A Quick Note About Hosting
This guide does not currently tackle hosting because it is focused on quick actions you can take in under an hour without needing to involve a developer or webmaster. If you are the decision maker regarding hosting, I highly encourage you to check on your current hosting plan and examine what your average time-to-first-byte is.
If you are currently on a shared hosting plan or your have a high TTFB, you need to upgrade your hosting plan or migrate to a new one ASAP. High TTFB issues, which cause a delay before your site even starts to load, is a sign you sit on a server and share resources with dozens to hundreds to thousands of other websites. That means your site will load slowly. Trust me, you don’t want this, and your bottom line cannot afford it. Upgrade ASAP.
Initial Test
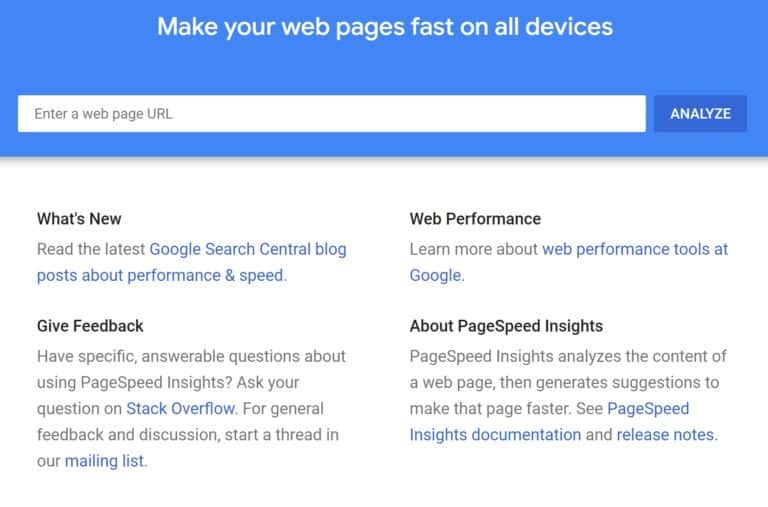
To begin, go to Google PageSpeed Insights and test your homepage (or any important page on your site).
This test isn’t 100% scientific, and I’ll encourage you to test a few important pages before you begin, but this will give you a good idea of what your issues are and how things improve after you implement the following changes.
After you run the tests, note what your mobile and desktop scores are.
Implementing Caching: WP Fastest Cache
- Initial cost: $0
- Initial paid plan cost: $49-$59/license
- Time to set up: 5 minutes
Instructions
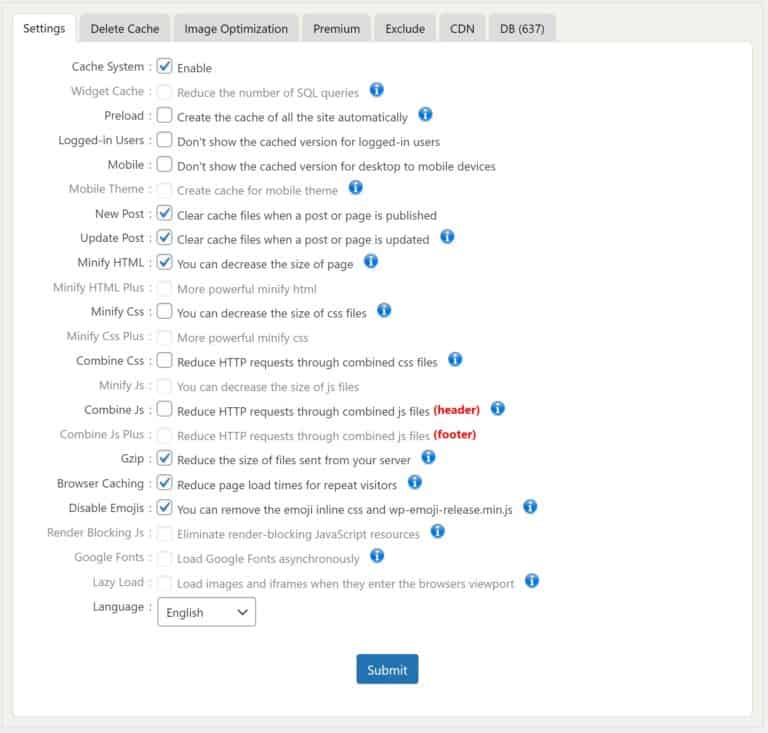
- Install and activate the plugin. Open the plugin settings.
- Enable the Caching System.
- Set New Post and Update Post to clear the cache settings whenever a post or page is created or updated.
- Enable Minify HTML.
- Enable GZIP compression and Browser Caching.
- Disable emojis if you do not plan on using them on your website.
- Click Submit.
- Review your website in a separate browser not logged in to ensure nothing is broken. If something does visually break, it is likely due to combining CSS files; disable that option and check again.
Cleaning Up HTML, CSS, and JavaScript: Autoptimize
Initial cost: $0
Time to set up: 5 minutes
Instructions
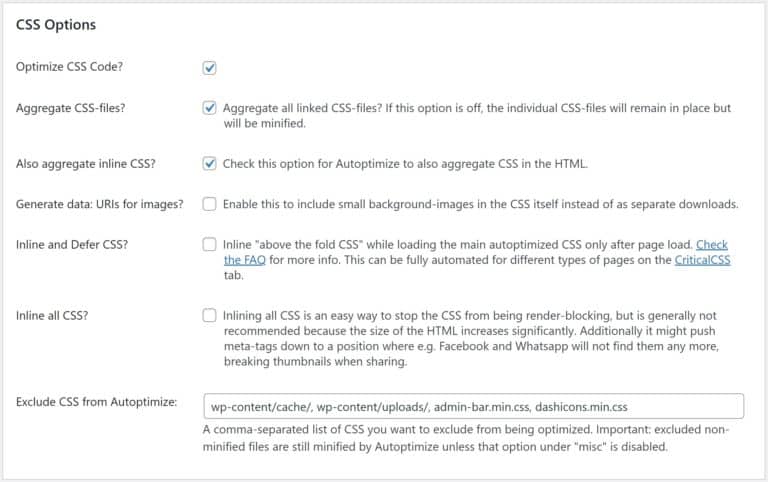
- Install and activate the plugin. Open the plugin settings and go to the tab JS, CSS, and HTML.
- Check Optimize CSS Code, Aggregate CSS Files, and Also Aggregate Inline CSS.
- Scroll down and click Submit.
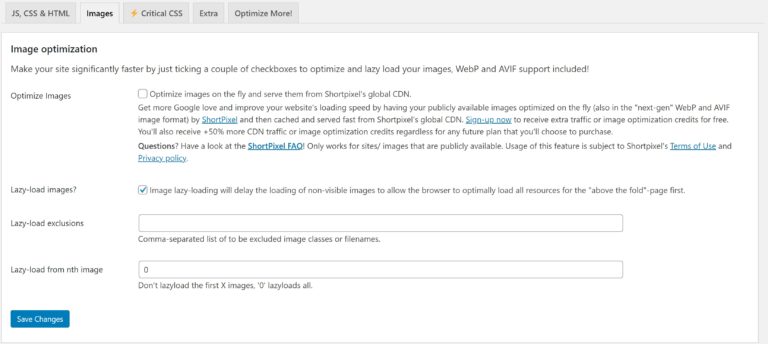
- Go to the tab Images.
- Check the box to lazy-load images and click Save Changes.
- Review your website in a separate browser while not logged in to ensure nothing is broken. If something does visually break, your website has something that conflicts with lazy loading images and you’ll need to deactivate the plugin.
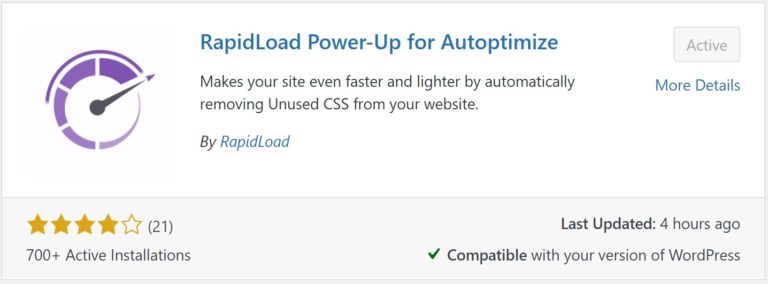
Removing Unnecessary CSS: Rapid Load
Initial cost: $10/month (or $7.50/month with an annual subscription)
Time to set up: 15 minutes
Note: You’ll be pairing this with the Autoptimize plugin.
Instructions
- Install and activate the plugin.
- Go to the RapidLoad website and sign up for a subscription. RapidLoad will email you your account password. Sign in and copy the API key.
- Go to Settings > RapidLoad and add your API key to connect the account.
- You’re done activating the plugin. It will automatically handle everything else.
- Review your website in a separate browser while not logged in to ensure nothing is broken.
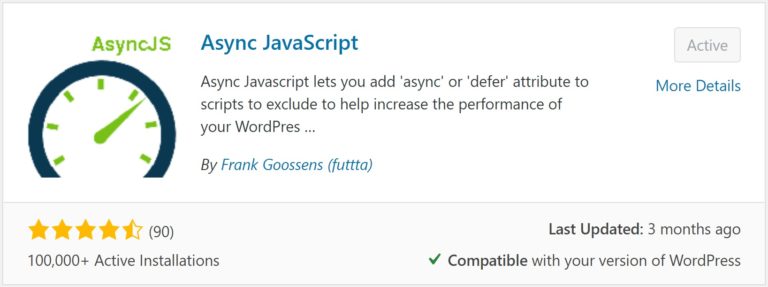
Fixing Render-Blocking JavaScript: Async JavaScript
Initial cost: $0
Time to set up: 5 minutes
Instructions
- Install and activate the plugin. Open the plugin settings.
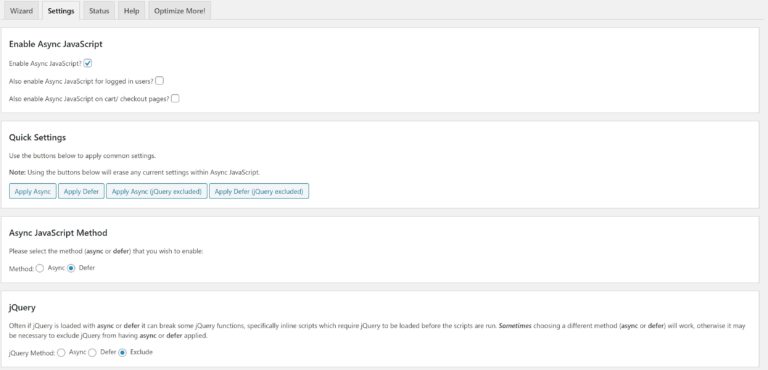
- Click Enable Async Javascript.
- Under Quick Settings, click Apply Defer (jQuery Excluded).
- Click Save Settings.
- Review your website in a separate browser while not logged in to ensure nothing is broken. If something does visually break, it is likely because there is a JavaScript file that is deferred, but is necessary to load the page. In the same browser, get a list of the JavaScript files being rendered using the Developer Console in the browser and experiment with adding scripts to the section Script Exclusion until the website stops breaking.
If you are wondering why setting up this plugin is so simple, it is because for most WordPress websites, most JavaScript files aren’t necessary to initially build a page. Instead, they add in extra functionality on the page, which is only useful after the page begins to display.
By deferring the files, you tell the browser to wait until the end of the loading process to begin loading those JavaScript files.
Compressing Images, Adding Lazy Loading, and Implementing Advanced Image Formats: ShortPixel
Initial cost: $5/month (you can sign up for the free plan, but odds are you have too many images to optimize)
Time to set up: 15 minutes
Instructions
- Install and activate the plugin.
- Go to ShortPixel’s website and sign up for the $5/month plan.
- After you sign up for a plan, navigate to the API Keys section and create an API key. Copy it.
- Open the plugin settings and go to the General tab. Paste your API key into the box and select Lossy. Make sure to check the Also Include Thumbnails, Image Backup, and Remove EXIF boxes. Then click Save Changes.
- Next, go to the Advanced tab. Scroll down to the WebP images section. Check the box to create WebP images for free.
- Underneath this, check the box to deliver WebP images on the frontend and look underneath that to see what your available options are.
- If you can check Without altering the page code (via .htaccess), check it. This will make it so you output WebP images without making any modifications.
- If your only option is Using <picture> tag syntax, check that. You’ll especially need to test your site to make sure nothing breaks.
- Lastly, make sure Automatically optimize Media Library items after they are uploaded (recommended) is checked, and then click Save Changes.
- Review your website in a separate browser while not logged in to ensure nothing is broken. If something does visually break, it is likely because you had to use <picture> tags to output WebP images – if that is the case, deactivate the Deliver WebP Images option.
- Finally, after the plugin is setup, you need to do one last thing: compress your images. You can either go to Media > Library and manually compress each individual image, or you can go to Media > Bulk ShortPixel and one-click compress all of your existing images.
Preloading Font Files: Asset CleanUp
Initial cost: $0/month
Time to set up: 5 minutes
Instructions
Note: The main reason we are using this plugin is to fix any issues with your font files. I would like to point out that you can and should use this plugin to deactivate unnecessary JavaScript and CSS files that load throughout your site; however, because every site is different, I cannot provide you with a concrete set of instructions to identify what you can turn off.
- Install and activate the plugin.
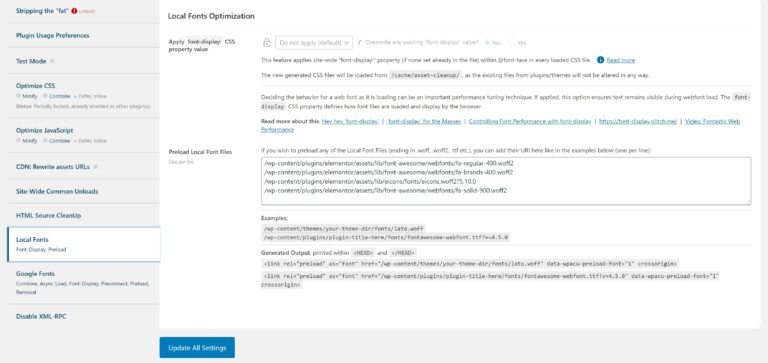
- Go to the PageSpeed Insights testing tool and test one of your pages. Examine the issues. Look for an issue about preloading font files. If it does appear, like it did for me, copy the URLs of the listed font files.
- Go to Asset CleanUp > Settings > Local Fonts. Paste your font URLs with the root domain removed from the URL (so it begins with the first / at the start of the URL), one per line, in the Preload Local Font Files section and click Update All Settings.
- Review your website in a separate browser while not logged in to ensure nothing is broken.
Final Test
Once you’ve finished installing and configuring the plugins and testing your site for issues, test the same pages in Google PageSpeed Insights again. You should notice a sizeable improvement in your mobile scores – likely anywhere from a 20-point to a 40-point improvement.
If you still have room to go, you’ll need to make more improvements, like adding a CDN or improving your hosting package.
Conclusion
If you’ve followed my guide and everything checked out, congratulations: you’ve sped up your website in less than 60 minutes. That’s awesome. The best part is it costs about $15/month to implement, though if you’re on a shoestring budget, you could remove RapidLoad and replace ShortPixel by manually compressing your images using Caesium (a open-source program you’d install on your laptop).
If everything didn’t check out and the quick fixes above caused errors, your site is a bit more complicated than an average one, and that isn’t a bad thing. It just means your site needs more attention than the average site. If you have one, I recommend asking your webmaster or developer for assistance.
And if you need help speeding up your site, or the changes above simply weren’t enough, you can always request my assistance. Just fill out my contact form and let me know what kind of problem you’re experiencing, and I’ll get back to you within 24 hours.
